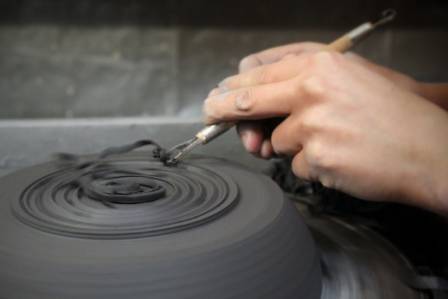
Introduction: The Primal Magic of Hand Built Pottery
There is a profound, almost spiritual connection in creating pottery with your hands—no machines, no shortcuts, just you, the clay, and the quiet rhythm of shaping earth into something functional and beautiful. For me, hand building has been a lifelong journey, beginning in high school and evolving through decades of working with locally dug clay from nearby pits, each batch carrying the unique mineral composition and history of the land. Unlike wheel-thrown pottery, which relies on centrifugal force, hand building is a slow, intentional practice that harkens back to humanity’s earliest creative endeavors—when our ancestors first shaped clay into vessels for cooking, storing, and storytelling. It is a craft that rewards patience, intuition, and a willingness to learn from the clay itself, as it responds to every pinch, press, and coil. In this expanded guide, I will share 12 foundational hand building and coil pottery techniques that have shaped my work, from the basics of rolling coils to the finesse of stone polishing. Whether you are a complete beginner taking your first steps with clay or an experienced hand builder looking to refine your skills, these techniques offer a roadmap to creating pieces that are not only structurally sound but also infused with your unique artistic voice. Along the way, I’ll weave in tips from master potters (like the legendary Maria Martinez), insights on clay behavior, and lessons learned from years of trial and error—because hand building is as much about embracing imperfection as it is about mastering technique.
Core Principles: Understanding Clay Before You Begin
Before diving into specific techniques, it’s crucial to understand the fundamental properties of clay that govern hand building success: moisture content, plasticity, and drying stages. Clay’s workability depends on its moisture—too wet, and it will slump or collapse; too dry, and it will crack when manipulated. Aim for a “plastic” consistency, where the clay is soft enough to bend without breaking and holds its shape when formed. Familiarize yourself with the key drying stages: wet clay (pliable, sticky), leather-hard clay (stiff but still slightly flexible, ideal for shaping and smoothing), bone-dry clay (completely dry, ready for sanding or firing), and bisque-fired clay (fired once to harden, ready for glazing). Another critical principle is “joining” or “bonding”—clay pieces (coils, slabs, pinch pots) must be scored (scratching the surface) and slipped (brushed with a thin clay-water mixture) to create a strong bond that withstands drying and firing. Neglecting proper bonding is the most common cause of cracks and breakage, so always prioritize this step, no matter how simple the project. Finally, remember that hand building is a dialogue with the clay: listen to how it responds to your touch, adjust your pressure accordingly, and don’t be afraid to let the clay guide you—some of my most beloved pieces emerged from happy accidents, where the clay’s natural tendencies led me in unexpected directions.
Rolling Coils: The Foundation of Coil Pottery
Rolling consistent, even coils is the backbone of coil pottery—every vessel built this way relies on coils that are uniform in thickness and length to ensure structural integrity and smooth shaping. At first glance, it may seem straightforward, but rolling coils is a skill that takes practice to master, much like riding a bike: once you find your rhythm, it becomes second nature. There are two primary methods: rolling between your palms or rolling on a clean, flat work surface (like a wooden board or canvas). When rolling between your hands, cup your palms slightly and apply gentle, even pressure as you roll back and forth, keeping your hands parallel to avoid tapering the ends. If rolling on a surface, use the heels of your hands to press the clay into a cylinder, then roll with steady pressure, rotating the coil occasionally to maintain roundness. Aim for coils that are ½ to 1 inch in diameter—thicker coils are sturdier for large vessels, while thinner coils allow for more delicate shaping. Common mistakes include applying uneven pressure (resulting in lumpy or tapered coils) and working with clay that’s too wet (coils will stretch and deform) or too dry (coils will crack). If you’re struggling, try cutting a length of rope to use as a guide for thickness, or watch demonstrations from master potters—Maria Martinez, for example, rolled coils with effortless precision, her hands moving in a fluid motion that came from decades of practice. With patience, you’ll develop muscle memory, and rolling coils will become a meditative, almost automatic part of the process.
Pushing Out the Form: Shaping Vessels from the Inside Out
Once you have your coils stacked and bonded, the next step is shaping the vessel—and “pushing out the form” is the technique that brings your creation to life. This method involves reaching inside the coil-built cylinder and gently pressing outward to expand the clay into your desired shape, whether it’s a rounded belly, a flared rim, or a tapered base. It’s a technique that requires both strength and finesse: too much pressure can stretch the clay thin and cause collapse, while too little won’t reshape the vessel effectively. For best results, use your fingertips or a smooth, rounded tool (like a gourd scraper, wooden modeling tool, or even the back of a spoon) to press the clay outward, working in small sections and rotating the vessel as you go. Maria Martinez was a master of this technique, as seen in her iconic black-on-black pottery: after stacking coils into a simple cylinder, she used a gourd scraper to deftly push out the sides, creating the graceful, bulbous shapes that defined her work (you can see this in action around the 4:30 mark of her demonstration video). The key is to work slowly and evenly, focusing on creating a consistent wall thickness as you shape—use your fingers to feel the outside of the vessel while pushing from the inside, ensuring no areas are too thin or uneven. Pushing out the form is where the vessel truly begins to take on personality, so don’t rush this step; take time to refine the curves and proportions until they feel balanced and harmonious.
Patting Slabs: Creating Bases and Flat Surfaces
Patting slabs is a simple yet essential technique for hand building, most commonly used to create bases for coil pots, pinch pots, or standalone slab-built pieces. It’s a primal, tactile process that reminds me of Mexican abuelas making tortillas—taking a ball of clay and transforming it into a flat, even disk through gentle, rhythmic patting. To start, take a fist-sized lump of clay and roll it into a smooth ball to eliminate air bubbles. Hold the ball between your palms and pat gently, rotating it slightly with each pat to ensure even thickness. As the disk begins to flatten, use the tips of your fingers to feel for thick spots, pinching and patting them thinner until the slab is consistent—usually ¼ to ½ inch thick, depending on the project. For larger slabs, you can place the clay on a flat surface and use a wooden paddle to pat it out, but for small bases (like those for coil pots), hand-patting is often sufficient. A variation is to use a “puki”—a traditional pottery mold (often made of gourd or wood) to support the slab while patting, ensuring it retains a round shape. Patting slabs is all about control: avoid slamming or pressing too hard, as this can trap air bubbles or cause the clay to crack. The goal is a smooth, even slab that will serve as a stable foundation for your vessel, whether it’s a small cup or a large storage jar.
Bonding Pinch: Securing Coils for Structural Integrity
In coil pottery, the bonding pinch is the most critical technique you’ll learn—without a strong bond between coils, your vessel will crack or fall apart during drying, firing, or use. This pinch is used to fuse each new coil to the existing wall of the pot, creating a seamless connection that distributes stress evenly. The basic method involves scoring both the top of the existing coil and the bottom of the new coil, applying a thin layer of slip (clay mixed with water) to both surfaces, then pressing the new coil into place and pinching firmly to blend the two layers. My preferred bonding pinch uses the index finger of one hand on the outside of the vessel and the thumb of the other hand on the inside, pressing down and slightly inward to compress the clay and eliminate gaps. The key is to pinch with enough pressure to merge the coils but not so much that you thin the wall excessively. Take your time with each coil—rush this step, and you’ll regret it later when cracks appear. For extra strength, especially on larger vessels, you can “weld” the coils by pinching and smoothing the seam both inside and outside the pot. Remember: the bond is only as strong as the clay itself, so ensure both coils are at a similar moisture level (leather-hard is ideal) and free of dust or debris that could prevent adhesion. Mastering the bonding pinch transforms a stack of coils into a unified vessel, capable of withstanding the rigors of firing and daily use.
Flat Pinch: Thinning and evening Vessel Walls
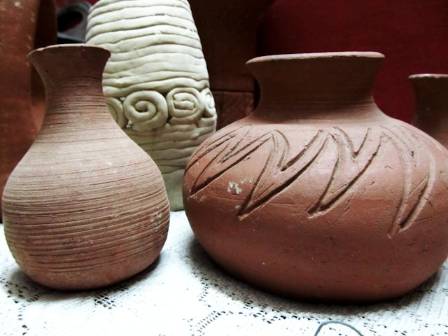
Once your coils are bonded, the flat pinch is used to thin and even out the vessel walls, creating a lightweight, balanced piece. This technique is performed with the thumb and forefinger of both hands, placed on opposite sides of the pot wall. Grip the clay gently but firmly, then pinch and release as you slowly rotate the vessel, moving upward from the base to the rim. The flat pinch is not about shaping the vessel (that’s the job of the compression pinch) but about refining its thickness—aim for a consistent wall thickness of ¼ to ⅓ inch, depending on the vessel’s size and purpose. As you pinch, use your fingertips to feel for thick spots, focusing on areas where coils may have overlapped or where the clay is uneven. It’s important to keep the pressure consistent—too much force can create indentations or thin the wall to the point of weakness, while too little won’t effectively thin the clay. The flat pinch is a meditative process, requiring focus and attention to the clay’s texture and thickness. I often close my eyes for short moments while pinching, relying on touch to guide me—this helps me detect subtle variations in thickness that I might miss with my eyes. With practice, the flat pinch becomes a intuitive step, resulting in walls that are smooth, even, and structurally sound.
Compression Pinch: Shaping Vessels with Intent
While the flat pinch thins the walls, the compression pinch is what gives your vessel its final shape and character. Simply stacking and flattening coils will result in a basic, flower-pot-like form, but the compression pinch allows you to manipulate the wall to create curves, narrow necks, flared rims, or rounded bellies. To execute a compression pinch, place both hands on the vessel wall as you would for a flat pinch, but instead of just pinching, gently squeeze your hands together to compress the clay inward, creating a slight pleat or curve. As you rotate the vessel, repeat this motion, gradually shaping the wall to your desired form—for a narrow-mouthed jar, compress the upper portion of the wall inward; for a rounded belly, compress the middle section gently outward. The compression pinch requires a delicate balance of pressure: too much compression can cause the wall to fold or crack, while too little won’t create a noticeable shape change. It’s best to work on leather-hard clay, which is stiff enough to hold its shape but still flexible enough to manipulate. I often use the compression pinch in layers—first shaping the overall form, then refining small details like the rim or shoulder of the pot. This technique is where your artistic vision truly comes to life, as you transform a simple coil structure into a vessel that reflects your style and intent.
Scraping: Refining Shape and Surface
Scraping is a often-overlooked but essential technique in hand building, used to refine the vessel’s shape, thin the walls, and create a smooth, consistent surface. After shaping the pot with pinches and coils, the surface is often lumpy, uneven, or marked with coil seams—scraping eliminates these imperfections, creating a clean canvas for further finishing. The tool you use for scraping depends on your preference and the clay’s consistency: a sharpened gourd scraper, a wooden rib, a metal rib, or even a piece of broken glass (handled carefully) works well. For wet or soft clay, use a flexible tool to avoid digging into the surface; for leather-hard clay, a stiffer tool can be used for more aggressive scraping. I typically scrape twice during the building process: first, immediately after shaping the vessel (when the clay is still wet) to smooth out major irregularities, and again when the clay reaches leather-hard to refine the shape and thin the walls further. When scraping, hold the tool at a 45-degree angle to the vessel wall and pull it gently downward, working in small, overlapping strokes. Focus on areas that are uneven or bulging, and use the tool to blend coil seams into the surrounding clay. Scraping not only improves the vessel’s appearance but also strengthens it by removing excess clay and creating a uniform wall thickness. It’s a satisfying step, as you watch the vessel transform from a rough coil structure into a sleek, refined form.
Sanding: Achieving a Smooth, Polished Surface
I’ll be honest—I’ve never loved sanding. It’s dusty, messy, and tedious, and it feels disconnected from the traditional pottery practices of my region, which rely on natural smoothing and polishing techniques developed over centuries. That said, sanding has its place in modern hand building, especially if you’re aiming for a ultra-smooth surface that hides minor imperfections or prepares the clay for painting or glazing. Sanding is best done on bone-dry clay, which is hard enough to withstand abrasion without crumbling. Use fine-grit sandpaper (220 to 400 grit) to avoid scratching the surface, and work in a well-ventilated area or outdoors to minimize dust inhalation (wear a mask for extra protection). Gently sand the entire vessel, focusing on rough spots, coil seams, or marks left from scraping. For a mirror-like finish, progress to finer grits (600 to 800 grit) and sand in circular motions. While sanding can create a beautiful surface, I encourage you to use it sparingly—over-sanding can remove too much clay, weakening the vessel, and it can strip the clay of its natural texture and character. If you prefer a more traditional look, consider skipping sanding altogether and relying on stone smoothing or polishing (techniques 9 and 10) to achieve a smooth surface that retains the clay’s organic feel.
Stone Smoothing: Blending and Preparing the Surface
Stone smoothing is a traditional technique that dates back to ancient pottery-making cultures, used to smooth the surface of leather-hard clay and eliminate marks from scraping, coiling, or pinching. Unlike sanding, which abrades the clay, stone smoothing compresses the surface, creating a dense, smooth texture that’s ideal for applying slip or paint. To practice stone smoothing, use a smooth, hard stone (like river rock, basalt, or soapstone) that fits comfortably in your hand. Wet the stone slightly (a damp stone glides more easily over clay) and rub it gently over the vessel’s surface in circular or linear motions. Focus on coil seams and rough areas, applying light pressure to blend the clay and create a uniform surface. The key is to work with leather-hard clay—if the clay is too wet, the stone will drag and distort the surface; if it’s too dry, the stone may scratch the clay. Stone smoothing not only improves the surface appearance but also strengthens the clay by compressing its particles, making it less porous and more resistant to cracking. I find this technique to be deeply satisfying, as it connects me to ancient potters who used the same method to refine their work. It’s a slow, intentional process that honors the clay and the craft’s history, resulting in a surface that’s smooth yet full of character.
Stone Polishing (Burnishing): Creating a Natural Gloss
Stone polishing, also known as burnishing, is the final step in achieving a high-gloss finish without glaze, a technique used by cultures around the world (including the Anasazi and Maria Martinez’s Pueblo people). Unlike stone smoothing, which is done on leather-hard clay, burnishing is performed on clay that is very nearly bone-dry—referred to as “dry leather-hard” or “greenware.” The goal is to compress the clay’s surface particles to create a dense, reflective finish that shines like glass. To burnish, use a smooth, polished stone (the same type used for smoothing works well) and rub it rapidly over the vessel’s surface with firm, consistent pressure. The motion should be quick and deliberate, not slow and gentle like smoothing. If the clay is too dry, mist the surface lightly with water (a spray bottle works best) to add a tiny bit of moisture, which helps the stone glide and prevents scratching. Work in small sections, burnishing until the surface develops a sheen, then move to the next area. Burnishing requires patience and elbow grease—achieving a deep gloss takes time, but the result is worth it: a vessel that glows with a natural, earthy luster, highlighting the clay’s color and texture. This technique is perfect for traditional-style pottery, as it celebrates the clay’s inherent beauty without covering it with glaze.
Slipping: Adding Color and Depth
Slipping is the process of applying a thin layer of colored clay (slip) to the surface of a vessel, used to add color, create contrast, or prepare the surface for decoration. Many clays suitable for hand building (like the local clay I use) are muted in color—browns, grays, or terracottas—while clays with vibrant colors (reds, blacks, whites) are often less plastic and harder to work with. Slipping solves this problem: build your vessel with a plastic, workable clay, then cover it with a slip made from a colored clay that complements your design. Slip can be applied in several ways: with a large, soft brush (my preferred method), with a piece of animal fur (for a textured finish), or by dipping the vessel in a bucket of slip (for an even coat). When applying slip, ensure the vessel is leather-hard—too wet, and the slip will run; too dry, and the slip will crack and peel. Apply thin, even coats, allowing each coat to dry slightly before adding another. For a layered effect, apply multiple colors of slip and use tools to create patterns or texture. Slipping not only adds visual interest but also seals the clay’s surface, making it less porous and easier to polish or glaze later. It’s a versatile technique that allows you to customize your vessels, adding personal flair while honoring the clay’s natural properties.
Pinch Pots: The Foundation of Hand Building
The pinch pot is the simplest and most ancient hand building technique, yet it’s capable of producing stunning, expressive forms. It’s the perfect starting point for beginners, as it requires no special tools—just a lump of clay and your hands. To make a pinch pot, take a fist-sized lump of clay and roll it into a smooth ball, eliminating air bubbles. Insert your thumb into the center of the ball, pressing down to create a hollow, leaving a ¼ to ½ inch thick base (too thin, and the base will crack; too thick, and the pot will be heavy). Once you have a small hollow, use your thumb on the inside and your fingers on the outside to pinch and stretch the clay upward, rotating the pot as you go. Gradually widen the opening and thin the walls, keeping the thickness consistent throughout. The key is to pinch gently and evenly—avoid pulling the clay too hard, as this can cause it to stretch and tear. With practice, you can shape pinch pots into bowls, cups, vases, or even sculptural forms. Some of the most impressive pinch pots I’ve seen are the Bronze Age-inspired pieces by my friend Graham Taylor, which showcase how this simple technique can be elevated to high art. For a masterclass in speed and precision, watch Maria Martinez’s demonstration video around the 6:00 mark—she creates a pinch pot in minutes, her hands moving with effortless skill honed over a lifetime.
Bonus Technique: Dealing with “Puki Rash”
If you use a puki (a traditional mold) to support your coil-built pots during shaping, you may encounter what I call “puki rash”—bumps, holes, rough spots, or indentations on the bottom of the vessel where it was in contact with the puki. This is a common challenge, as the bottom of the pot is often still soft when removed from the puki, making it vulnerable to damage. To fix puki rash, handle the pot with extreme care, supporting the sides to avoid crushing the top (which may still be soft). Use a small, sharp tool (like a needle tool or the tip of a gourd scraper) to gently scrape down high spots and ridges. For holes or gaps, roll tiny balls of clay (matching the pot’s clay in moisture and color) and press them into the holes, smoothing the edges with your fingertips to blend them into the surrounding clay. It’s a delicate process—work quickly but carefully, while the bottom clay is still soft enough to manipulate but the rest of the pot is dry enough to hold its shape. The best way to prevent puki rash is to line the puki with a thin layer of damp cloth or paper before placing the clay, which creates a barrier and reduces friction. If you do encounter puki rash, view it as an opportunity to refine your skills—with a little patience, you can transform a rough bottom into a smooth, professional finish.
Conclusion: The Journey of Hand Building

Hand building clay is a lifelong journey of learning, experimentation, and connection—to the earth, to tradition, and to your own creativity. The 12 techniques shared here are the foundation of my practice, but they are just the beginning—there is always more to learn, more ways to grow, and more secrets to uncover in the clay. Whether you’re building a simple pinch pot or a complex coil jar, remember that the true beauty of hand building lies not in perfection but in the process: the feel of clay between your hands, the rhythm of shaping and bonding, and the satisfaction of creating something with your own two hands. Draw inspiration from master potters like Maria Martinez, who dedicated their lives to honing their craft, and from the ancient traditions that remind us of hand building’s place in humanity’s story. If you want to deepen your skills, consider exploring online classes (like my video-based workshops) or reading books like Clint Swink’s Messages From the High Desert, which details how to recreate Anasazi pottery techniques. Most importantly, practice regularly, embrace mistakes as learning opportunities, and let the clay guide you. Hand building is more than a craft—it’s a way of slowing down, being present, and creating something that carries a piece of your soul. So grab a lump of clay, roll your first coil, and begin your own journey—you’ll be amazed at what you can create.