विशेष लेख
Needle Felting Basics: Tools, Wool, and How to Begin
Needle felting is a delightful craft that allows you to create small sculpted animals, ornaments, and decorative items from wool. The process can seem almost magical at first, as loose fibers gradually transform into firm, detailed shapes through repeated needlework.
Magnus Ravenswood
लेखक
लेख परिचय
नीचे पूरा लेख पढ़ें।
अनुभाग
समाचार
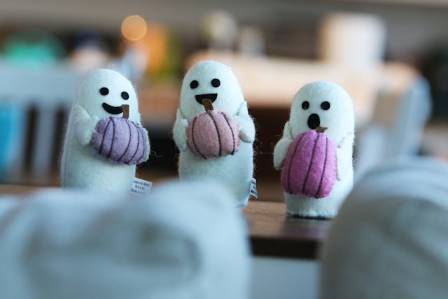
Needle felting is a delightful craft that allows you to create small sculpted animals, ornaments, and decorative items from wool. The process can seem almost magical at first, as loose fibers gradually transform into firm, detailed shapes through repeated needlework.
As interest in handmade fiber arts grows, more crafters are discovering needle felting for its simplicity and charm. It requires minimal space, only a few essential tools, and delivers satisfying results for both beginners and experienced makers.
The History and Modern Appeal of Needle Felting
Needle felting has deep roots in traditional wool crafts. Historically, felt was primarily functional, used for clothing, rugs, or insulation rather than decorative objects. These centuries-old techniques laid the foundation for today’s creative fiber arts.
Modern needle felting techniques emerged in the 1980s, enabling artists to sculpt wool into detailed, three-dimensional forms. Its versatility quickly attracted crafters who enjoy making animals, ornaments, dolls, and other 3D creations with just simple tools and small amounts of wool.
Understanding the Needle Felting Process
Needle felting, also called dry felting, uses a barbed or notched needle, wool fibers, finger protectors, and a foam or wool pad. By repeatedly inserting the needle into the wool, the barbs catch and tangle fibers, compressing them into a dense felt. This controlled friction is the basis for most beginner techniques and 3D wool sculptures.
Wet felting is another method, using hot water, soap, and agitation to bond fibers into a solid sheet. Wet felting is better suited for larger, flatter projects like bags, coasters, or wall art. Needle felting, however, excels at creating small, detailed, three-dimensional objects. Wet-felted pieces are usually smooth and uniform, while needle-felted items have a textured surface ideal for sculpted animals and miniature designs.
Needle Felting Project Ideas: Endless Possibilities
Needle felting allows virtually limitless creativity. While wet felting suits larger items like hats and blankets, needle felting is perfect for small, intricate forms. Artists can craft woodland animals, pets, farm animals, flowers, mushrooms, trees, whimsical dolls, fairies, and seasonal figures. Even insects, birds, turtles, and frogs can be sculpted with patience and practice. Layering wool, blending colors, and shaping fibers carefully makes nearly any subject—real or imagined—come to life in 3D.
Quick Project Ideas:
-
Animals: Bears, beavers, bees, birds, cats, dogs, foxes, frogs, goats, hedgehogs, horses, llamas, mice, owls, penguins, rabbits, sheep, snails, spiders, turtles
-
Plants & Nature: Cactus, flowers, mushrooms, trees, pumpkins, houseplants, fruits
-
Whimsical & Decorative: Dolls, fairies, snowmen, ornaments, keychains
Essential Felting Tools and Supplies
Needle felting is beginner-friendly because it requires only a few tools. Kits typically include everything needed to create small figures or ornaments, but supplies can also be gathered individually. A compact toolkit makes it easy to work even in small spaces.
Choosing the Right Needle
A notched needle is essential. Needles come in sizes with gauges from 32 to 42—lower numbers indicate larger needles, which affect the final look of your project.
Protecting Your Fingers
Rapid needle movement can be hazardous. Finger protectors made of leather, rubber, or silicone are essential to prevent injury.
Using a Felting Pad
A foam or wool pad placed under your project protects your workspace and provides a firm surface for safe, effective felting.
Selecting Wool
Different types of wool affect the ease of felting. Carded or combed wool (roving, tops, slivers, batts) is ideal for shaping 3D figures. Finer wools like Merino are soft but may slip easily, while coarser wools provide better friction for layering and shaping. Raw wool is not recommended, while scoured or core wool can serve specific purposes. Synthetic fibers are a budget-friendly option for practice.
Tip: Start with slightly larger shapes than needed, as wool compresses during felting. Layer and blend colors gradually for shading or realistic textures.
From Wool to Finished Project
Form the Base Shape
Begin with a rough outline of your subject. For example, start an animal’s head as an oval or egg shape.
Felt the Core
Use repeated needle pokes to compress the wool into a firm structure. Core wool or inexpensive fibers can be used in hidden areas.
Add Color and Detail
Layer colored wool over the base to achieve the desired appearance. Small details, like paws or facial features, can be crafted separately and attached with needle felting.
Blend and Shape
Mix fibers to create shading and texture. Continue needling until fibers interlock and the surface achieves the desired smoothness and texture.
Final Touches
Refine edges, adjust proportions, and add small details until the sculpture is complete. Patience and repetition are essential—needle felting rewards consistent, careful work.
Needle felting is celebrated for being accessible and endlessly creative. From simple beginner projects to intricate designs, it allows experimentation with shapes, textures, and colors. Whether for personal enjoyment or handmade gifts, needle felting continues to inspire fiber artists worldwide.
यह भी पढ़ें
Snow Place Like Home: Winter Landscapes in Prints
Eleanor Whitmore

एथनिक वियर चुनने के लिए एक व्यापक गाइड: फिटिंग, फैब्रिक और स्टाइल
किशोर मिश्र

The Benefits of Outdoor Play: Why It's Essential
Cybill

Bavarian Forest Excursions: Nature, Culture, and Hidden Gems
Luna

पृथ्वी का सबसे दूर स्थित अंतरिक्ष यान कौन सा है?
देवांश

आदर्श प्राकृतिक फ्रूट स्मूदी बनाना
अभिनव गोयल